Difference between revisions of "Remote projects on RT-Druid"
| (57 intermediate revisions by 2 users not shown) | |||
| Line 1: | Line 1: | ||
| + | <span style="color:#FFFFFF; background:#FF0000"> The content of this page is deprecated as we suggest to always use cross-compilation running RT-Druid on a local project. </span> | ||
| + | |||
| + | |||
== Introduction == | == Introduction == | ||
| Line 13: | Line 16: | ||
Similarly, all the tools and the environment variables needed by the building process must be available/set on the target. | Similarly, all the tools and the environment variables needed by the building process must be available/set on the target. | ||
| + | |||
| + | == Plugins installation on Eclipse == | ||
| + | |||
| + | This Section illustrates how to add the support for remote projects to Eclipse.<br> | ||
| + | The procedure, which must be done only once, will install the following plugins into Eclipse: | ||
| + | * Remote System Explorer User Actions | ||
| + | * TM Terminal | ||
| + | |||
| + | These plugins can be easily installed through the typical steps for installing a plugin: | ||
| + | <ol> | ||
| + | <li> <code>Menu</code> → <code>Help</code> → <code>Install new Software</code> | ||
| + | <li> Select the ''neon'' update site of Eclipse and wait until the list is properly refreshed | ||
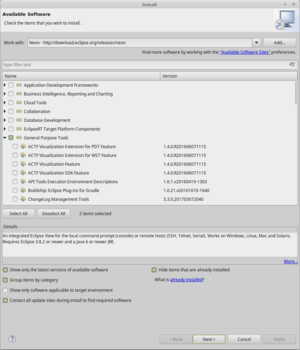
| + | <li> Search ''General Purpose Tools''<br> [[File:Rtdruid_remote_install_1.png|thumb|center|Figure 1: Plugins installation (1).]] | ||
| + | <li> Select the following plugins: | ||
| + | <ul> | ||
| + | <li> ''Remote System Explorer User Actions''<br> which adds support for remote projects | ||
| + | <li> ''TM Terminal''<br> which allows opening an SSH shell within Eclipse <br> | ||
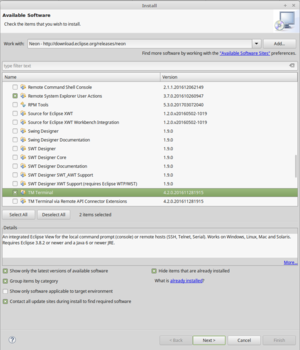
| + | [[File:Rtdruid_remote_install_2.png|thumb|center|Figure 2: Plugins installation (2).]] | ||
| + | </ul> | ||
| + | <li> Click in <code>Next</code> to finish the installation, and then restart Eclipse | ||
| + | </ol> | ||
| + | |||
| + | |||
| + | == Establishing a connection with the target == | ||
| + | |||
| + | Once Eclipse has been restarted, follow the next steps to establish an SSH connection with the target. | ||
| + | |||
| + | <ol> | ||
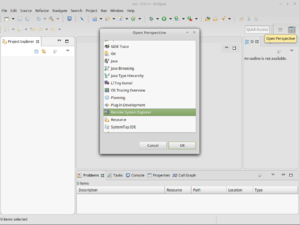
| + | <li> Open the ''Remote System Explorer'' perspective (press the button on the right top) | ||
| + | [[File:Rtdruid_perspective.png|thumb|center|Figure 3: Open perspective.]] | ||
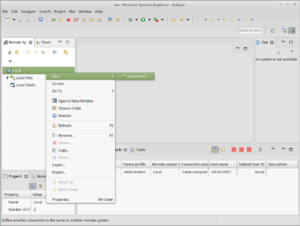
| + | <li> From the ''Remote System'' view, press the right mouse button on ''local'' and create a new connection | ||
| + | [[File:Rtdruid_remote_new_connection.png|thumb|center|Figure 4: New connection.]] | ||
| + | <li> Select ''SSH Only'' | ||
| + | [[File:Rtdruid_remote_new_connection_ssh_1.png|thumb|center|Figure 5: New SSH connection.]] | ||
| + | <li> Specify the connection parameters | ||
| + | [[File:Rtdruid_remote_new_connection_ssh_2.png|thumb|center|Figure 6: SSH connection parameters.]] | ||
| + | This way, a new connection will be created. | ||
| + | <li> Clicking the ''Sftp'' branch, Eclipse will ask the credentials to access the file | ||
| + | [[File:Rtdruid_remote_sftp_configuration.png|thumb|center|Figure 7: SFTP parameters.]] | ||
| + | </ol> | ||
| + | |||
| + | |||
| + | == Remote project creation == | ||
| + | |||
| + | Before creating the remote project in Eclipse, it is important to put a copy of the ERIKA3 RTOS on the target.<br> | ||
| + | This can be easily done by e.g. cloning the Erika3 git repository: | ||
| + | |||
| + | git clone https://github.com/evidence/erika3.git | ||
| + | |||
| + | In addition, all the needed application files (i.e., oil, .h and .c files) must be transferred to the target as well. | ||
| + | |||
| + | Then, on Eclipse: | ||
| + | |||
| + | <ol> | ||
| + | <li> On the remote filesystem, select '''the directory that will host the project on the target'''.<br> | ||
| + | Note1: We suggest to specify a directory in <code>pkg/arch/.../examples/</code>.<br> | ||
| + | Note2: The specified directory must include the oil file and the source files.<br> | ||
| + | Note3: During the next steps, RT-Druid will create the <code>out/</code> subdirectory containing the configuration.<br> | ||
| + | Then, click the right mouse button and select ''Create Remote Project'' | ||
| + | [[File:Rtdruid_remote_new_remote_project.png|thumb|center|Figure 8: New remote project.]] | ||
| + | <li> Going back to the C/C++ perspective, it will be possible to see the remote project and, in case, generate the code for ERIKA [[File:Rtdruid_remote_build.png|thumb|center|Figure 8: The remote project.]] If the directory selected for the remote project does not yet contain an "RT-Druid" project, the generation of the configuration files for ERIKA won't be supported. | ||
| + | Follow the next steps to enable such functionality: | ||
| + | <ol> | ||
| + | <li> Click the right mouse button on the project in the ''Project Explorer'' window | ||
| + | <li> Select the ''Configure'' item | ||
| + | <li> Click the ''Add RT-Druid Builder'' sub-item <br>[[File:Rtdruid_remote_add_rtd_builder.png|thumb|center|Figure 9: Add RT-Druid builder.]] | ||
| + | </ol> | ||
| + | </ol> | ||
| + | |||
| + | Once this operation is finished, the project will be able of generating the configuration of ERIKA, but still needs to be configured.<br> | ||
| + | In particular, we need to provide the following information: | ||
| + | * which OIL file contains the system configuration; | ||
| + | * the path of ERIKA; | ||
| + | * the path of the generator files. | ||
| + | |||
| + | This information can be provided through the following steps: | ||
| + | <ol> | ||
| + | <li> Open the project properties (i.e., by clocking with the right button on the project, or selecting <code>Project</code> → <code>Properties</code> once the project has been selected).<br>[[File:rtdruid_remote_project_properties_menu.png|thumb|center|Figure 10: Project properties.]] | ||
| + | <li> Select the ''Oil'' item and specify the oil file on the target through the ''Browse'' button<br> | ||
| + | [[File:rtdruid_remote_set_conf_oil.png|thumb|center|Figure 11: Selecting the OIL file.]] | ||
| + | <li> Select the ''Erika Files Location'' item and: | ||
| + | <ul> | ||
| + | <li> In the ''Manual'' box, specify the path of ERIKA '''on the target'''.<br> | ||
| + | This path must be specified manually (don't use the ''File system...'' button as it has no visibility of the target filesystem). | ||
| + | <li> Specify the path on the local filesystem where the RT-Druid packet is located.<br> | ||
| + | You can select ''Plugins'' for using the pack shipped within the current Eclipse tool.<br> | ||
| + | [[File:rtdruid_remote_set_erika_path.png|thumb|center|Figure 12: Specifying ERIKA files path.]] | ||
| + | </ul> | ||
| + | <li> Click ''Ok'' to complete the configuration | ||
| + | </ol> | ||
| + | |||
| + | == Generation of project configuration files == | ||
| + | |||
| + | Once RT-Druid has been configured as illustrated in the previous steps, it is capable of generating the configuration of the specific project starting from the configuration specified in the OIL file. | ||
| + | Thus, if the Eclipse automatic build flag is checked (in the <code>Project</code> menu), RT-Druid re-generates the ERIKA configuration files whenever the OIL file specified in the project properties is saved. | ||
| + | |||
| + | [[File:rtdruid_remote_build_automatically.png|thumb|center|Figure 13: Automatic build settings.]] | ||
| + | |||
| + | It is possible to delete the ERIKA folders by clicking with the right mouse button on the project and selecting the ''Clean Erika'' item. | ||
| + | |||
| + | [[File:rtdruid_remote_clean_erika.png|thumb|center|Figure 14: Clean ERIKA files.]] | ||
| + | |||
| + | The deleted folders can be regenerated through the following steps: | ||
| + | * Change and modify the OIL file | ||
| + | * Clean and then rebuild the project | ||
| + | |||
| + | [[File:rtdruid_remote_clean_project.png|thumb|center|Figure 15: Rebuild the deleted files (1).]] | ||
| + | |||
| + | [[File:rtdruid_remote_clean_project_dialog.png|thumb|center|Figure 16: Rebuild the deleted files (2).]] | ||
| + | |||
| + | Note that when the automatic build is not enabled, the system automatically asks if to start a project build. | ||
| + | |||
| + | == Project build == | ||
| + | |||
| + | Now that the project has been properly configured, and the configuration files have been generated, it is possible to connect to the target and start the native building of the ERIKA3 binary file. | ||
| + | |||
| + | If the ''TM Terminal'' plugin has been installed (as illustrated above), it is possible to open a view containing an SSH console from within Eclipse.<br> | ||
| + | Note that this step (as well as the plugin installation) is not mandatory, as it is possible to connect to the target through different tools.<br> | ||
| + | Nevertheless, the next steps show how to use this console for building the binary on the target through the <code>make</code> command. | ||
| + | |||
| + | <ol> | ||
| + | <li> Open a new view (<code>Menu</code>→ <code>Window</code>→ <code>Show View</code>→ <code>Other...</code>) and search ''Terminal''<br>[[File:rtdruid_remote_ssh_view.png|thumb|center|Figure 17: View for SSH connection.]] | ||
| + | <li> Press the button on the right of the ''Terminal'' view to create a new connection:<br> | ||
| + | [[File:rtdruid_remote_ssh_new.png|thumb|center|Figure 18: New SSH connection.]] | ||
| + | <li> Select SSH and specify the connection parameters:<br> | ||
| + | [[File:rtdruid_remote_ssh_launch.png|thumb|center|Figure 19: SSH configuration.]] | ||
| + | <li> Once the console has been created, it is possible to use the typical remote commands (e.g., <code>cd</code> and <code>ls</code>):<br>[[File:rtdruid_remote_ssh_ls.png|thumb|center|Figure 20: Remote commands.]] | ||
| + | <li> Enter the <code>out</code> directory within the project directory and run the <code>make</code> command to build the ERIKA binary.<br> | ||
| + | In case you build a binary for Jailhouse, remember to properly export the <code>JAILHOUSE_DIR</code> variable before starting the build process.<br>[[File:rtdruid_remote_ssh_make.png|thumb|center|Figure 21: Make command.]] | ||
| + | </ol> | ||
== Notes == | == Notes == | ||
| Line 19: | Line 152: | ||
*# Acceleo generates files in a directory within the local workspace: <code>.metadata/.plugins/com.eu.evidence.rtdruid3.oil.cdt.ui/oil_gen</code> | *# Acceleo generates files in a directory within the local workspace: <code>.metadata/.plugins/com.eu.evidence.rtdruid3.oil.cdt.ui/oil_gen</code> | ||
*# RT-Druid copies the files from the local to the remote directory (using the Eclipse virtualization) | *# RT-Druid copies the files from the local to the remote directory (using the Eclipse virtualization) | ||
| + | |||
| + | <!--Commented since tha page is deprecated --> | ||
| + | <!--[[Category:RT-Druid]]--> | ||
Latest revision as of 09:53, 13 March 2018
The content of this page is deprecated as we suggest to always use cross-compilation running RT-Druid on a local project.
Contents
Introduction
There are some scenarios in which the board has the processing capabilities for running a full compiler for native building.
This is the case, for example, of powerful multi-core ARM SoCs running a Linux distribution, where we may use a hypervisor like Jailhouse for running ERIKA alongside Linux.
In such circumstances, having a native compilation of ERIKA on the target could be easier than cross-compiling using a host machine.
Unfortunately, the Eclipse IDE requires an x86 platform with a fair amount of resources (in terms of both processing and memory).
This guide, therefore, explains how to set-up Eclipse on a host x86 machine, leaving the compilation process on the target.
Handling a remote project can be done manually, of course, by transferring the built files through ftp/scp/rsync or by mounting locally the target filesystem using nfs/sshfs.
However, this guide explains how to use the remote project feature of Eclipse, which internally relies on the sftp protocol.
Important: the code of ERIKA must be available on the target because it is needed by the build process. Similarly, all the tools and the environment variables needed by the building process must be available/set on the target.
Plugins installation on Eclipse
This Section illustrates how to add the support for remote projects to Eclipse.
The procedure, which must be done only once, will install the following plugins into Eclipse:
- Remote System Explorer User Actions
- TM Terminal
These plugins can be easily installed through the typical steps for installing a plugin:
-
Menu→Help→Install new Software - Select the neon update site of Eclipse and wait until the list is properly refreshed
- Search General Purpose Tools
- Select the following plugins:
- Remote System Explorer User Actions
which adds support for remote projects - TM Terminal
which allows opening an SSH shell within Eclipse
- Remote System Explorer User Actions
- Click in
Nextto finish the installation, and then restart Eclipse
Establishing a connection with the target
Once Eclipse has been restarted, follow the next steps to establish an SSH connection with the target.
- Open the Remote System Explorer perspective (press the button on the right top)
- From the Remote System view, press the right mouse button on local and create a new connection
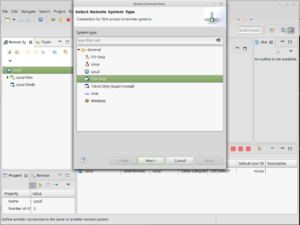
- Select SSH Only
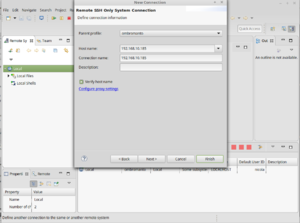
- Specify the connection parameters
This way, a new connection will be created.
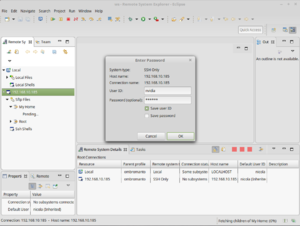
- Clicking the Sftp branch, Eclipse will ask the credentials to access the file
Remote project creation
Before creating the remote project in Eclipse, it is important to put a copy of the ERIKA3 RTOS on the target.
This can be easily done by e.g. cloning the Erika3 git repository:
git clone https://github.com/evidence/erika3.git
In addition, all the needed application files (i.e., oil, .h and .c files) must be transferred to the target as well.
Then, on Eclipse:
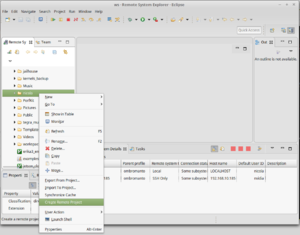
- On the remote filesystem, select the directory that will host the project on the target.
Note1: We suggest to specify a directory inpkg/arch/.../examples/.
Note2: The specified directory must include the oil file and the source files.
Note3: During the next steps, RT-Druid will create theout/subdirectory containing the configuration.
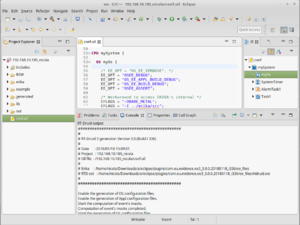
Then, click the right mouse button and select Create Remote Project - Going back to the C/C++ perspective, it will be possible to see the remote project and, in case, generate the code for ERIKA If the directory selected for the remote project does not yet contain an "RT-Druid" project, the generation of the configuration files for ERIKA won't be supported.
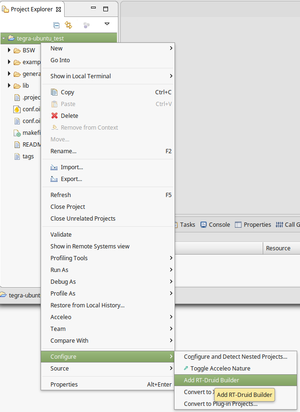
Follow the next steps to enable such functionality:
- Click the right mouse button on the project in the Project Explorer window
- Select the Configure item
- Click the Add RT-Druid Builder sub-item
Once this operation is finished, the project will be able of generating the configuration of ERIKA, but still needs to be configured.
In particular, we need to provide the following information:
- which OIL file contains the system configuration;
- the path of ERIKA;
- the path of the generator files.
This information can be provided through the following steps:
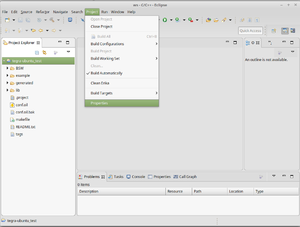
- Open the project properties (i.e., by clocking with the right button on the project, or selecting
Project→Propertiesonce the project has been selected).
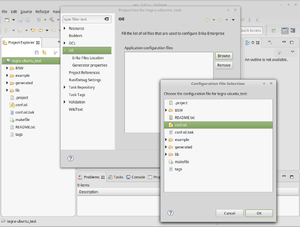
- Select the Oil item and specify the oil file on the target through the Browse button
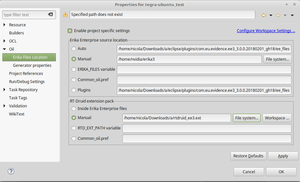
- Select the Erika Files Location item and:
- In the Manual box, specify the path of ERIKA on the target.
This path must be specified manually (don't use the File system... button as it has no visibility of the target filesystem). - Specify the path on the local filesystem where the RT-Druid packet is located.
You can select Plugins for using the pack shipped within the current Eclipse tool.
- In the Manual box, specify the path of ERIKA on the target.
- Click Ok to complete the configuration
Generation of project configuration files
Once RT-Druid has been configured as illustrated in the previous steps, it is capable of generating the configuration of the specific project starting from the configuration specified in the OIL file.
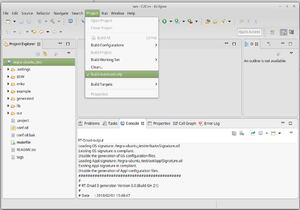
Thus, if the Eclipse automatic build flag is checked (in the Project menu), RT-Druid re-generates the ERIKA configuration files whenever the OIL file specified in the project properties is saved.
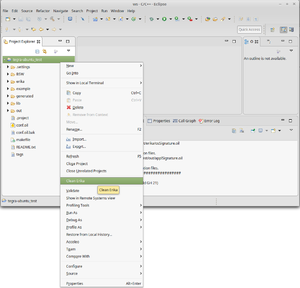
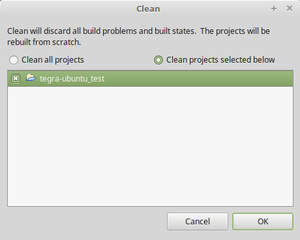
It is possible to delete the ERIKA folders by clicking with the right mouse button on the project and selecting the Clean Erika item.
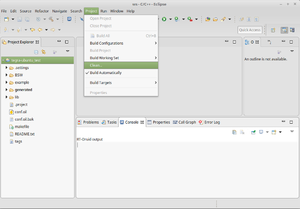
The deleted folders can be regenerated through the following steps:
- Change and modify the OIL file
- Clean and then rebuild the project
Note that when the automatic build is not enabled, the system automatically asks if to start a project build.
Project build
Now that the project has been properly configured, and the configuration files have been generated, it is possible to connect to the target and start the native building of the ERIKA3 binary file.
If the TM Terminal plugin has been installed (as illustrated above), it is possible to open a view containing an SSH console from within Eclipse.
Note that this step (as well as the plugin installation) is not mandatory, as it is possible to connect to the target through different tools.
Nevertheless, the next steps show how to use this console for building the binary on the target through the make command.
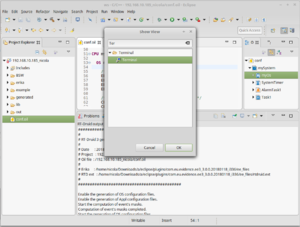
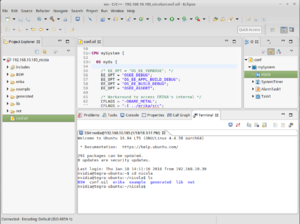
- Open a new view (
Menu→Window→Show View→Other...) and search Terminal
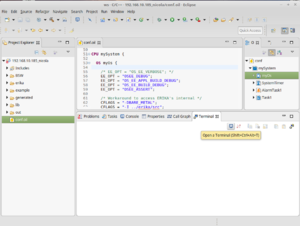
- Press the button on the right of the Terminal view to create a new connection:
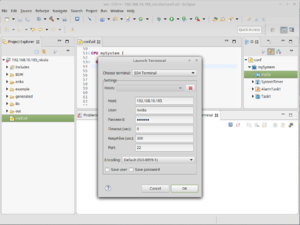
- Select SSH and specify the connection parameters:
- Once the console has been created, it is possible to use the typical remote commands (e.g.,
cdandls):
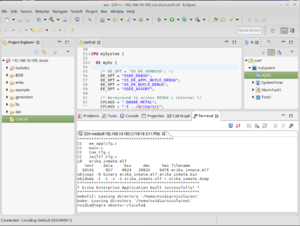
- Enter the
outdirectory within the project directory and run themakecommand to build the ERIKA binary.
In case you build a binary for Jailhouse, remember to properly export theJAILHOUSE_DIRvariable before starting the build process.
Notes
- Currently, Acceleo is not capable of generating files on top of the Eclipse virtualization. The generation is therefore done in two steps:
- Acceleo generates files in a directory within the local workspace:
.metadata/.plugins/com.eu.evidence.rtdruid3.oil.cdt.ui/oil_gen - RT-Druid copies the files from the local to the remote directory (using the Eclipse virtualization)
- Acceleo generates files in a directory within the local workspace:
