Difference between revisions of "VBOX-3610"
(→Jailhouse installation) |
|||
| Line 7: | Line 7: | ||
This section explains how to build and install Jailhouse on the platform and how to create an ERIKA3 guest (AKA Jailhouse inmate) running a simple application. | This section explains how to build and install Jailhouse on the platform and how to create an ERIKA3 guest (AKA Jailhouse inmate) running a simple application. | ||
| + | |||
| + | == Platform setup for Jailhouse == | ||
| + | |||
| + | The hypervisor requires a contiguous piece of RAM for itself and each additional cell. | ||
| + | This can be done by adding | ||
| + | <pre> | ||
| + | memmap=68M$0x3b000000 | ||
| + | </pre> | ||
| + | |||
| + | as parameter to the command line of the Linux kernel. | ||
| + | Note that if you plan to put this parameter in GRUB2 variables (e.g. in the <code>/etc/default/grub</code> file), | ||
| + | then you will need three escape characters before the dollar (e.g. GRUB_CMDLINE_LINUX_DEFAULT="memmap=68M\\\$0x3b000000"). | ||
| + | |||
| + | Additionally, if the inmate needs access to the serial console (like the one shown below), | ||
| + | then the Linux kernel command line parameters must not include the serial console. | ||
| + | In this case, it can be useful to manually initialize the console through the following command just before enabling the hypervisor: | ||
| + | <pre> | ||
| + | sudo stty -F /dev/ttyS0 115200 | ||
| + | </pre> | ||
| + | |||
| + | |||
== Jailhouse build and installation == | == Jailhouse build and installation == | ||
Revision as of 16:52, 11 May 2018
Contents
Introduction
The ERIKA3 RTOS can be run as a guest OS of the Jailhouse hypervisor on the VBOX-3610 platform containing a dual-core Intel i7 processor.
Such support has been developed in the context of the RETINA European project.
This section explains how to build and install Jailhouse on the platform and how to create an ERIKA3 guest (AKA Jailhouse inmate) running a simple application.
Platform setup for Jailhouse
The hypervisor requires a contiguous piece of RAM for itself and each additional cell. This can be done by adding
memmap=68M$0x3b000000
as parameter to the command line of the Linux kernel.
Note that if you plan to put this parameter in GRUB2 variables (e.g. in the /etc/default/grub file),
then you will need three escape characters before the dollar (e.g. GRUB_CMDLINE_LINUX_DEFAULT="memmap=68M\\\$0x3b000000").
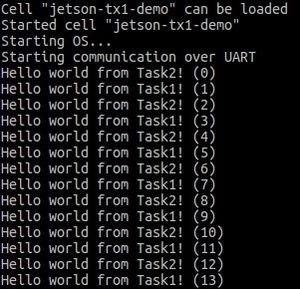
Additionally, if the inmate needs access to the serial console (like the one shown below), then the Linux kernel command line parameters must not include the serial console. In this case, it can be useful to manually initialize the console through the following command just before enabling the hypervisor:
sudo stty -F /dev/ttyS0 115200
Jailhouse build and installation
Information about how to download and build Jailhouse for a Intel platform can be found on the official project page.
In brief:
- Download the hypervisor:
git clone https://github.com/siemens/jailhouse.git - Enter the Jailhouse directory:
cd jailhouse - Build the hypervisor:
sudo make install - Create the root cell configuration:
sudo jailhouse config create configs/x86/sysconfig.c - Create the ERIKA cell configuration in
configs/x86/erika_cell.c:#include <jailhouse/types.h> #include <jailhouse/cell-config.h> #define ARRAY_SIZE(a) sizeof(a) / sizeof(a[0]) struct { struct jailhouse_cell_desc cell; __u64 cpus[1]; struct jailhouse_memory mem_regions[2]; struct jailhouse_cache cache_regions[1]; __u8 pio_bitmap[0x2000]; } __attribute__((packed)) config = { .cell = { .signature = JAILHOUSE_CELL_DESC_SIGNATURE, .revision = JAILHOUSE_CONFIG_REVISION, .name = "erika", .cpu_set_size = sizeof(config.cpus), .num_memory_regions = ARRAY_SIZE(config.mem_regions), .num_cache_regions = ARRAY_SIZE(config.cache_regions), .num_irqchips = 0, .pio_bitmap_size = ARRAY_SIZE(config.pio_bitmap), .num_pci_devices = 0, }, .cpus = { 0x8, }, .mem_regions = { /* RAM */ { .phys_start = 0x3f000000, .virt_start = 0, .size = 0x00100000, .flags = JAILHOUSE_MEM_READ | JAILHOUSE_MEM_WRITE | JAILHOUSE_MEM_EXECUTE | JAILHOUSE_MEM_LOADABLE, }, /* communication region */ { .virt_start = 0x00100000, .size = 0x00001000, .flags = JAILHOUSE_MEM_READ | JAILHOUSE_MEM_WRITE | JAILHOUSE_MEM_COMM_REGION, }, }, .cache_regions = { { .start = 0, .size = 2, .type = JAILHOUSE_CACHE_L3, }, }, /* I need to access 0xa35 and 0xa36 only, but I have to open 0xa37 too, don't know why... (mask should be ~0x30, not ~0x70) */ .pio_bitmap = { [ 0/8 ... 0x3f7/8] = -1, [ 0x3f8/8 ... 0x3ff/8] = 0, [ 0x400/8 ... 0xa2f/8] = -1, [ 0xa30/8 ... 0xa37/8] = ~0x70, [ 0xa38/8 ... 0xe00f/8] = -1, [0xe010/8 ... 0xe017/8] = 0, [0xe018/8 ... 0xffff/8] = -1, }, }; - Build the cell configurations:
sudo make
RT-Druid set-up
Once Jailhouse has been successfully built and installed onto the platform, you have to set-up the RT-Druid development environment to compile the ERIKA3 RTOS.
Follow the next instructions for installing RT-Druid on the platform:
- Download the RT-Druid package from the download section of the ERIKA3 website
- Extract the downloaded archive
- Open a shell and type
export JAILHOUSE_VERSION=0.8
export JAILHOUSE_DIR=/path/to/compiled/jailhouse
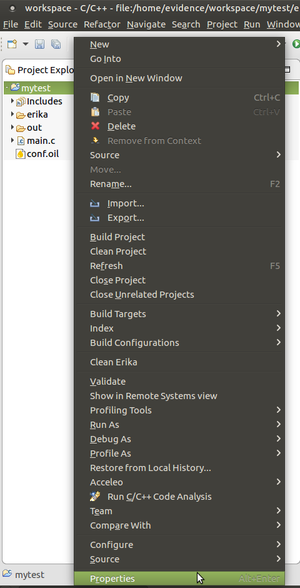
Note that RT-Druid allows to set these variables also from within Eclipse. Just press the right mouse button on the Eclipse project and select Properties as shown in the following figure.
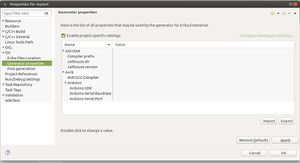
Then, select Generator properties, enable project specific settings (as shown in the next figure), and set the desired values.
- Then, using the same shell, enter the extracted archive and run
./eclipse
Simple application
We now show a simple "helloworld" application consisting of two tasks printing on the serial interface.
- Run the RT-Druid tool as explained above
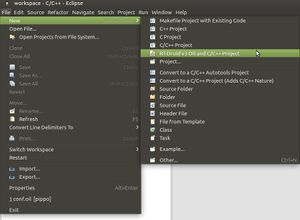
- Create a new project by clicking on
New→RT-Druid v3 Oil and C/C++ Projectas shown in the next Figure: - Name the new project (e.g.,
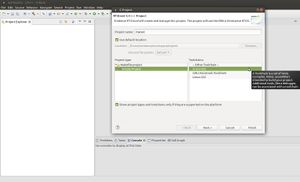
mytest) as shown in the next Figure: - Check the box for using an existing template and select
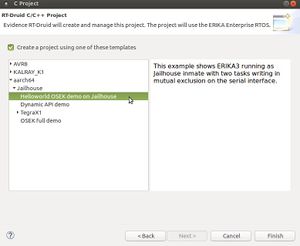
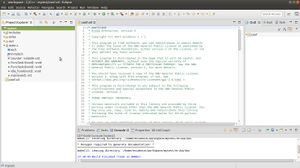
x86-64→Jailhouse→Helloworld OSEK demo on Jailhouseas shown in the next Figure: - Eclipse will then show the new project, and RT-Druid will generate the configuration files, as shown in the next Figure:
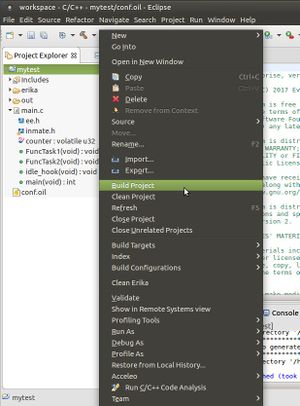
- Click with the right mouse key on the project and select
Build projectas shown in the next Figure: - Install the Jailhouse driver:
sudo modprobe jailhouse - Enable Jailhouse:
sudo jailhouse enable configs/x86/sysconfig.cell - Create the cell for ERIKA3:
sudo jailhouse cell create configs/x86/erika_cell.cell - Load the ERIKA3 application:
sudo jailhouse cell load erika erika_inmate.bin - Start the ERIKA3 application:
sudo jailhouse cell start erika - Then, on the serial interface, you will see the two tasks printing alternatively on the serial interface, as shown in the next figure:
