Difference between revisions of "Quick start guide"
(→Erika distribution clean) |
|||
| Line 39: | Line 39: | ||
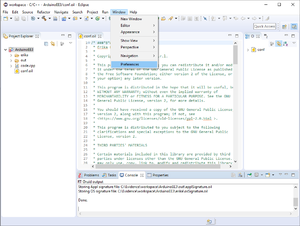
* Click on ''Window->Preferences'' menu entry as shown in the following figure: | * Click on ''Window->Preferences'' menu entry as shown in the following figure: | ||
| − | [[File:Arduino tutorial 11.png|thumb|center|Figure | + | [[File:Arduino tutorial 11.png|thumb|center|Figure 4: RT-Druid Eclipse Preferences.]] |
* ERIKA PREFERENCES | * ERIKA PREFERENCES | ||
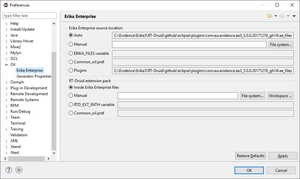
| − | [[File:Erika3 preferences.png|thumb|center|Figure | + | [[File:Erika3 preferences.png|thumb|center|Figure 5: Erika Preferences.]] |
* The RT-Druid Eclipse Preferences window will open as shown in the following figure: | * The RT-Druid Eclipse Preferences window will open as shown in the following figure: | ||
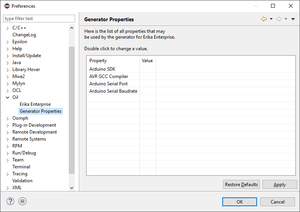
| − | [[File:Arduino tutorial 12.png|thumb|center|Figure | + | [[File:Arduino tutorial 12.png|thumb|center|Figure 6: RT-Druid Eclipse Preferences OIL.]] |
| Line 56: | Line 56: | ||
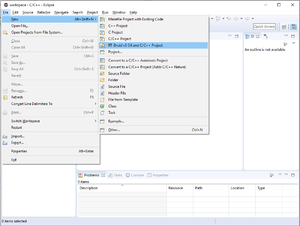
* Click on ''File->New->RT-Druid v3 Oil and C/C++ Project'' menu entry as shown in the following figure: | * Click on ''File->New->RT-Druid v3 Oil and C/C++ Project'' menu entry as shown in the following figure: | ||
| − | [[File:Arduino tutorial 4.png|thumb|center|Figure | + | [[File:Arduino tutorial 4.png|thumb|center|Figure 7: RT-Druid v3 Oil and C/C++ Project.]] |
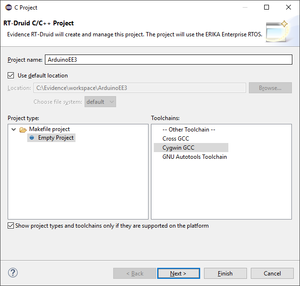
* The ''RT-Druid C/C++ Project Wizard'' will open as shown in the following figure: | * The ''RT-Druid C/C++ Project Wizard'' will open as shown in the following figure: | ||
| − | [[File:Arduino tutorial 5.png|thumb|center|Figure | + | [[File:Arduino tutorial 5.png|thumb|center|Figure 8: RT-Druid C/C++ Project Wizard.]] |
* Type the name of the the project in the ''Project name'' text-box: ''ArduinoEE3'' for example. | * Type the name of the the project in the ''Project name'' text-box: ''ArduinoEE3'' for example. | ||
| Line 68: | Line 68: | ||
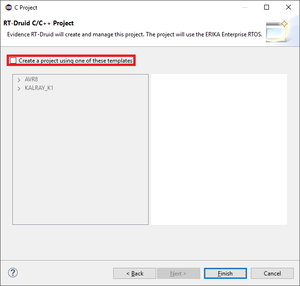
* The wizard will show the window to select a project template as shown in the following figure: | * The wizard will show the window to select a project template as shown in the following figure: | ||
| − | [[File:Arduino tutorial 6.png|thumb|center|Figure | + | [[File:Arduino tutorial 6.png|thumb|center|Figure 9: RT-Druid Project Template Wizard.]] |
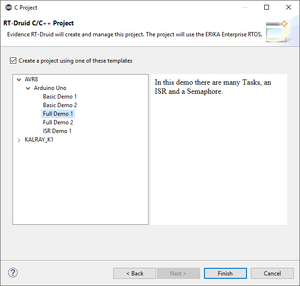
* Click on ''Create a project using one of these templates'' check-box to let the Template Wizard to show the available templates as shown in the following figure: | * Click on ''Create a project using one of these templates'' check-box to let the Template Wizard to show the available templates as shown in the following figure: | ||
| − | [[File:Arduino tutorial 7.png|thumb|center|Figure | + | [[File:Arduino tutorial 7.png|thumb|center|Figure 10: RT-Druid Available Templates Wizard.]] |
* As example, expand ''AVR8'' and ''Arduino Uno'' entries and choose a desired template to instantiate: ''Full Demo 2'' for example. | * As example, expand ''AVR8'' and ''Arduino Uno'' entries and choose a desired template to instantiate: ''Full Demo 2'' for example. | ||
| Line 78: | Line 78: | ||
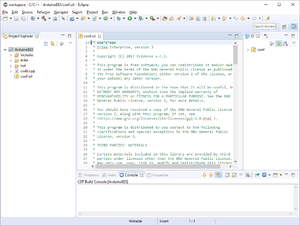
* Finally, click on ''Finish'' button to instantiate an RT-Druid Eclipse project from a chosen template as shown in the following figure: | * Finally, click on ''Finish'' button to instantiate an RT-Druid Eclipse project from a chosen template as shown in the following figure: | ||
| − | [[File:Arduino tutorial 8.png|thumb|center|Figure | + | [[File:Arduino tutorial 8.png|thumb|center|Figure 11: RT-Druid Eclipse Project.]] |
= Building a project = | = Building a project = | ||
| Line 84: | Line 84: | ||
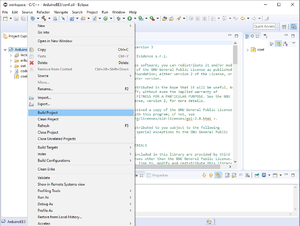
* Right-Click on your project, as example ''ArduinoEE3'', shown in the Eclipse ''Project Explorer'' panel, and then click on ''Build Project'' context-menu entry as shown in the following figure: | * Right-Click on your project, as example ''ArduinoEE3'', shown in the Eclipse ''Project Explorer'' panel, and then click on ''Build Project'' context-menu entry as shown in the following figure: | ||
| − | [[File:Arduino tutorial 19.png|thumb|center|Figure | + | [[File:Arduino tutorial 19.png|thumb|center|Figure 12: Erika project build.]] |
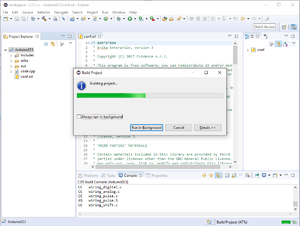
* The build process start as shown in the following figure: | * The build process start as shown in the following figure: | ||
| − | [[File:Arduino tutorial 20.png|thumb|center|Figure | + | [[File:Arduino tutorial 20.png|thumb|center|Figure 13: Erika build process.]] |
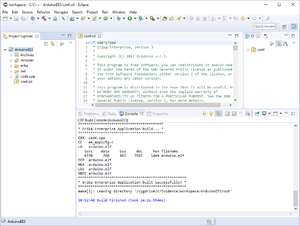
* The build process ends successfully as shown in the following figure: | * The build process ends successfully as shown in the following figure: | ||
| − | [[File:Arduino tutorial 21.png|thumb|center|Figure | + | [[File:Arduino tutorial 21.png|thumb|center|Figure 14: Erika build successfully.]] |
= Erika distribution clean = | = Erika distribution clean = | ||
| Line 100: | Line 100: | ||
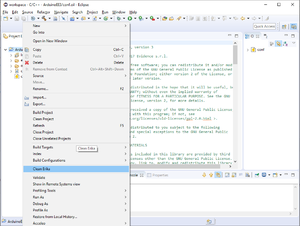
* Right-Click on your project, as example ''ArduinoEE3'', shown in the Eclipse ''Project Explorer'' panel, and then click on ''Clean Erika'' context-menu entry as shown in the following figure: | * Right-Click on your project, as example ''ArduinoEE3'', shown in the Eclipse ''Project Explorer'' panel, and then click on ''Clean Erika'' context-menu entry as shown in the following figure: | ||
| − | [[File:Arduino tutorial 17.png|thumb|center|Figure | + | [[File:Arduino tutorial 17.png|thumb|center|Figure 15: Erika Clean.]] |
* The ''Clean up Erika Files'' dialog window will appear as shown in the following figure: | * The ''Clean up Erika Files'' dialog window will appear as shown in the following figure: | ||
| − | [[File:Arduino tutorial 18.png|thumb|center|Figure | + | [[File:Arduino tutorial 18.png|thumb|center|Figure 16: Clean up Erika Files.]] |
* Click on ''Yes'' button to clean the entire Erika distribution. | * Click on ''Yes'' button to clean the entire Erika distribution. | ||
| Line 110: | Line 110: | ||
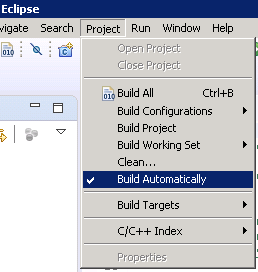
'''NOTE:''' the distribution folder will be automatically regenerated, if the flag ''Build Automatically'' is enabled. | '''NOTE:''' the distribution folder will be automatically regenerated, if the flag ''Build Automatically'' is enabled. | ||
| − | [[File:Eclipse_build_automaitcally.png|thumb|center|Figure | + | [[File:Eclipse_build_automaitcally.png|thumb|center|Figure 17: Build automatically flag.]] |
'''NOTE:''' this operation may be necessary every time an Erika or RT-Druid configuration property is modified. | '''NOTE:''' this operation may be necessary every time an Erika or RT-Druid configuration property is modified. | ||
Revision as of 13:10, 22 December 2017
Contents
Prerequisites
The following is the list of software that should be already be installed in your system before installing ERIKA v3:
- Java
- for running Eclipse
- Cygwin
- for the GNU make tool (and optionally Doxygen)
- Doxygen
- for the automatic documentation
- target compiler (depending on the architecture)
Downloading ERIKA v3 and RT-Druid
- RT-Druid can be downloaded using the download web page
- To download RT-Druid, you have to accept the RT-Druid and the ERIKA v3 licenses
- The ERIKA v3 license is a GPL v2, whereas the RT-druid license is a proprietary license that allows you to use the provided version of RT-Druid at no cost
- Here is possible to find more details about the release scheduling and build numbers of RT-Druid packaging.
Installing RT-Druid
RT-Druid is provided as a compressed archive, which can be unpacked in your user directories. On Windows machines, we typically unpack the tool under C:\Evidence\versionnumber, where 'versionnumber' is the build number.
Starting RT-Druid
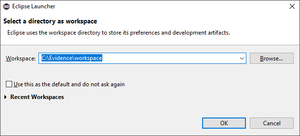
- Double-Click on eclipse.exe application located into eclipse folder extracted from the RT-Druid Package and than the workspace selection window will appear as shown the following figure:
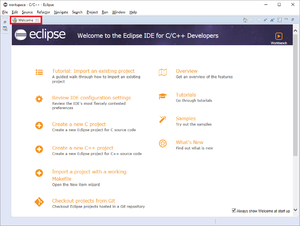
- Browse the File-System to select Workspace folder and then click on the OK button to let the RT-Druid Eclipse IDE start as shown in the following figure:
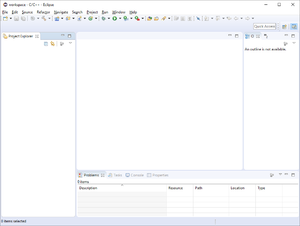
- Click on Welcome tab-sheet close button to show the default RT-Druid Eclipe IDE C/C++ perspective as shown in the following figure:
RT-Druid Preferences
The RT-Druid code generator and makefiles need to make reference to external directories (e.g., for specifying the compiler path), or other configurations (such as serial port numbers, baud rates, ...).
- Click on Window->Preferences menu entry as shown in the following figure:
- ERIKA PREFERENCES
- The RT-Druid Eclipse Preferences window will open as shown in the following figure:
For more details about RT-Druid Configuration, see the RT-Druid configuraiton wiki page.
RT-Druid Project
- Click on File->New->RT-Druid v3 Oil and C/C++ Project menu entry as shown in the following figure:
- The RT-Druid C/C++ Project Wizard will open as shown in the following figure:
- Type the name of the the project in the Project name text-box: ArduinoEE3 for example.
- If you are using Windows OS, you should select the Cygwin GCC toolchain, and then click on the Next button.
- The wizard will show the window to select a project template as shown in the following figure:
- Click on Create a project using one of these templates check-box to let the Template Wizard to show the available templates as shown in the following figure:
- As example, expand AVR8 and Arduino Uno entries and choose a desired template to instantiate: Full Demo 2 for example.
- Finally, click on Finish button to instantiate an RT-Druid Eclipse project from a chosen template as shown in the following figure:
Building a project
- Right-Click on your project, as example ArduinoEE3, shown in the Eclipse Project Explorer panel, and then click on Build Project context-menu entry as shown in the following figure:
- The build process start as shown in the following figure:
- The build process ends successfully as shown in the following figure:
Erika distribution clean
To completely clean your project, you have to remove both generated and compiled files. This is done using the Clean Erika functions, as explain below.
- Right-Click on your project, as example ArduinoEE3, shown in the Eclipse Project Explorer panel, and then click on Clean Erika context-menu entry as shown in the following figure:
- The Clean up Erika Files dialog window will appear as shown in the following figure:
- Click on Yes button to clean the entire Erika distribution.
NOTE: the distribution folder will be automatically regenerated, if the flag Build Automatically is enabled.
NOTE: this operation may be necessary every time an Erika or RT-Druid configuration property is modified.
Anatomy of a ERIKA v3 Project
- explain the directories
- explain the role of each directory / main files
- check the auto-generated documenattion...
Per Architecture tutorials
- list of the available tutorials (AVR8)
