Difference between revisions of "Microchip dsPIC33/PIC24 - dsPIC33EV-SK application build on Windows"
From ERIKA WIKI
(→Application Upload on Arduino Board) |
(→Synopsys) |
||
| Line 1: | Line 1: | ||
= Synopsys = | = Synopsys = | ||
This guide illustrates how to build and run a first ERIKA Enterprise v3 application for [http://www.microchip.com/developmenttools/productdetails.aspx?partno=dm330018 dsPIC33EV 5V CAN-LIN STARTER KIT] board. | This guide illustrates how to build and run a first ERIKA Enterprise v3 application for [http://www.microchip.com/developmenttools/productdetails.aspx?partno=dm330018 dsPIC33EV 5V CAN-LIN STARTER KIT] board. | ||
| + | |||
| + | = Prerequisites = | ||
| + | |||
| + | Please remember to install [[Java]], [[Cygwin]], and [[Doxygen]] to obtain the full functionality described in this tutorial. | ||
| + | |||
| + | Additional information on prerequisites is available at the [[Quick_start_guide#Prerequisites| Quick Start Guide - Prerequisites]]. | ||
= RT-Druid Eclipse IDE = | = RT-Druid Eclipse IDE = | ||
Revision as of 15:53, 24 May 2018
Contents
Synopsys
This guide illustrates how to build and run a first ERIKA Enterprise v3 application for dsPIC33EV 5V CAN-LIN STARTER KIT board.
Prerequisites
Please remember to install Java, Cygwin, and Doxygen to obtain the full functionality described in this tutorial.
Additional information on prerequisites is available at the Quick Start Guide - Prerequisites.
RT-Druid Eclipse IDE
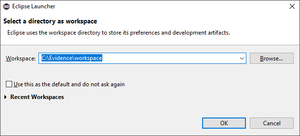
- Double-click the eclipse.exe application located in the eclipse folder extracted from the RT-Druid Package. Then, the workspace selection window will appear as shown in the following figure:
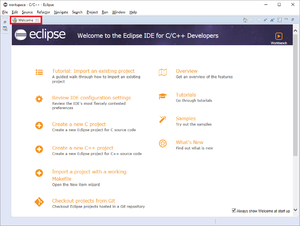
- Browse the file-system to select Workspace folder and then click on the OK button to let the RT-Druid Eclipse IDE start as shown in the following figure:
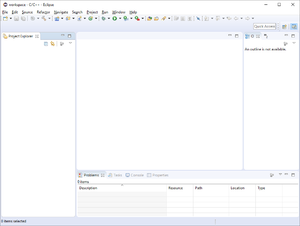
- Click on the Welcome tab-sheet close button to show the default RT-Druid Eclipse IDE C/C++ perspective as shown in the following figure:
RT-Druid Template Project
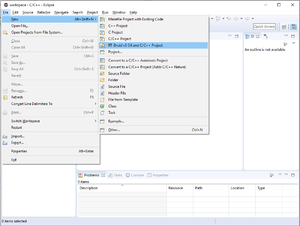
- Click on File->New->RT-Druid v3 Oil and C/C++ Project menu entry as shown in the following figure:
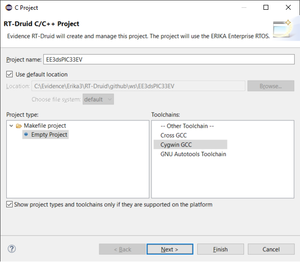
- The RT-Druid C/C++ Project Wizard will open as shown in the following figure:
- Type the name of the project in the Project name text-box (e.g., EE3dsPIC33EV).
- Make sure the Cygwin GCC toolchain is selected and then click on the Next button.
- The wizard will show the window to select a project template as shown in the following figure:
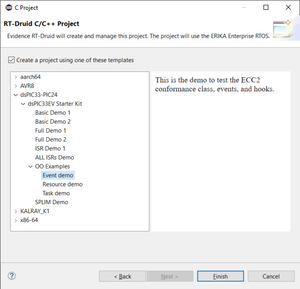
- Click on Create a project using one of these templates check-box to let the Template Wizard to show the available templates as shown in the following figure:
- Expand the dsPIC33-PIC24 and dsPIC33EV Starter Kit entries and choose the desired template to instantiate: Event Demo for example.
- Finally, click on the Finish button to instantiate an RT-Druid Eclipse project from a chosen template as shown in the following figure:
RT-Druid Configuration
- Click on the Window->Preferences menu entry as shown in the following figure:
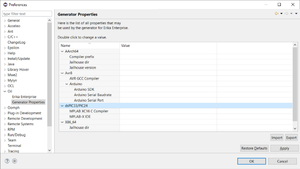
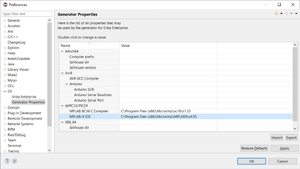
- The RT-Druid Eclipse Preferences window will open as shown in the following figure:
- Click the Generator Properties entry in the OIL section of the left panel to show the RT-Druid Generator Properties to configure.
- Double-click on the MPLAB XC16 C Compiler property to configure the MPLAB XC16 C Compiler installation path as shown in the following figure:
- Browse the file-system to select the MPLAB XC16 C Compiler path (E.g. C:\Program Files (x86)\Microchip\xc16\v1.33) and then click the OK button.
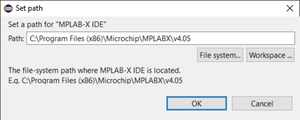
- Double-click on the MPLAB-X IDE property to configure the MPLAB-X IDE installation path as shown in the following figure:
- Browse the file-system to select the MPLAB-X IDE path (E.g. C:\Program Files (x86)\Microchip\MPLABX\v4.05) and then click the OK button.
- Finally, click the OK button to confirm the configuration properties as shown in the following figure:
ERIKA distribution clean
- Right-Click on EE3dsPIC33EV project into Eclipse Project Explorer panel and click on Clean Erika context-menu entry as shown in the following figure:
- The Clean up Erika Files dialog window will appear as shown in the following figure:
- Click on the Yes button to clean the whole ERIKA distribution.
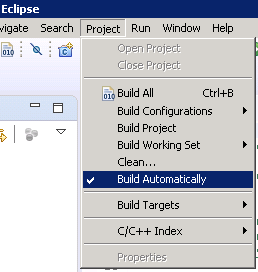
NOTE: the distribution folder will be automatically regenerated if the flag Build Automatically is enabled.
NOTE: this operation may be necessary every time an ERIKA or RT-Druid configuration property is modified.
ERIKA project build
- Right-click on EE3dsPIC33EV project into Eclipse Project Explorer panel and click on Build Project context-menu entry as shown in the following figure:
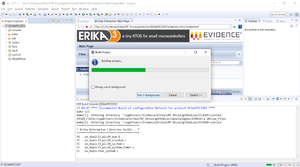
- The build process starts as shown in the following figure:
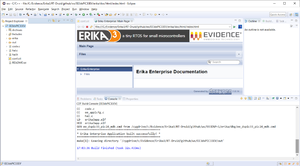
- The build process ends successfully as shown in the following figure:
Add Upload Build Target
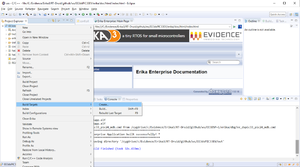
- Right-Click on EE3dsPIC33EV project into Eclipse Project Explorer panel and click on Create... item of the Build Target context-menu entry, as shown in the following figure:
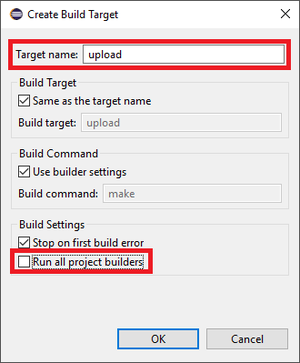
- The Create Build Target dialog window will appear as shown in the following figure:
- Type upload into Target name text-box, uncheck the Run all project builders check-box and then click on OK button.
- The upload target will be created as shown in the following figure:
'NOTE: this operation should be done once for every ERIKA project.
Application Upload on dsPIC33EV-SK Board
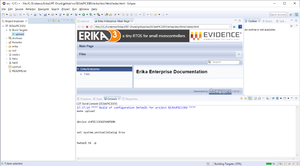
- Double-Click on upload build target created in the previous section to start the upload process as shown in the following figure:
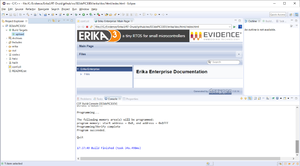
- The upload process ends successfully as shown in the following figure:
- Check the application running on dsPIC33EV-SK board.
Additional Notes
T.B.D.
